Framed Vintage Scarves

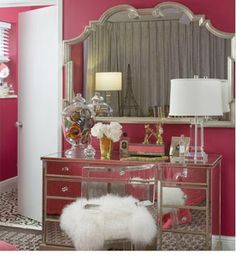
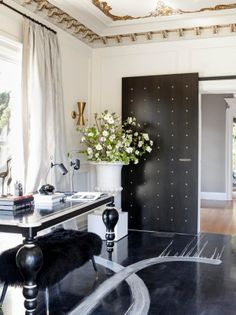
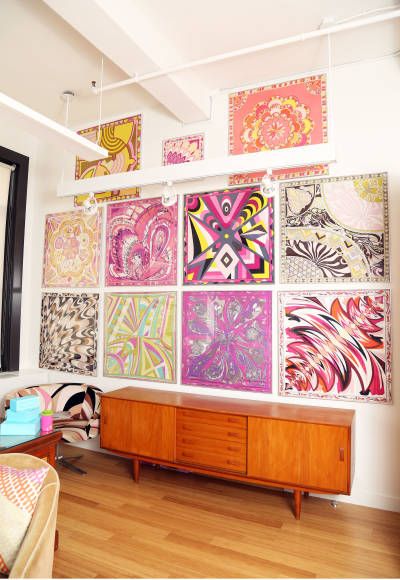
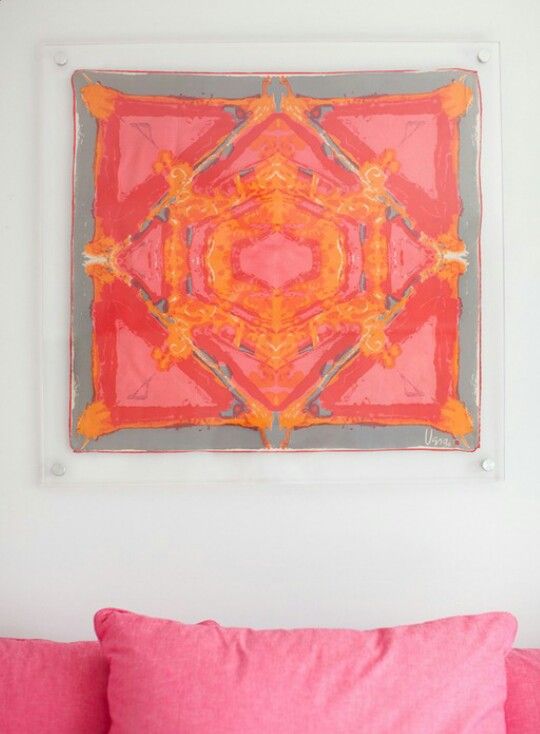
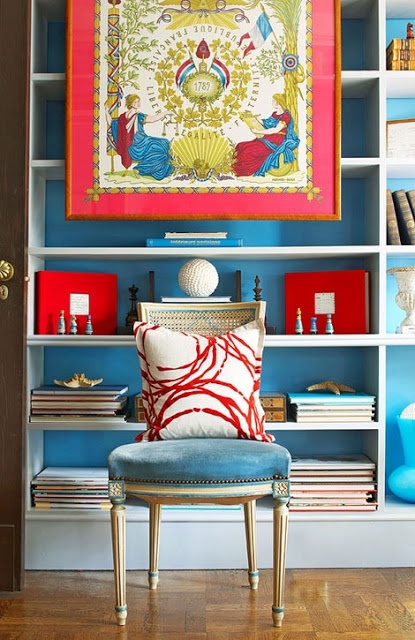
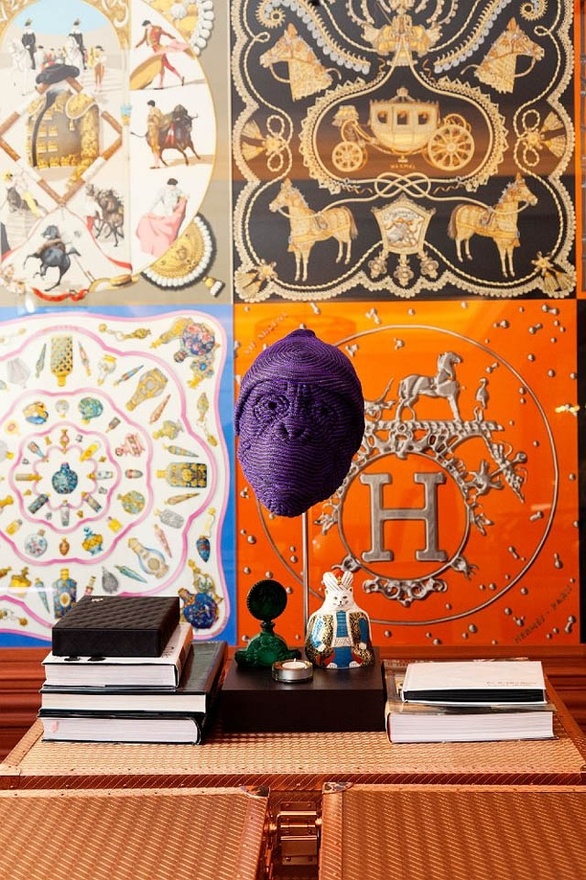
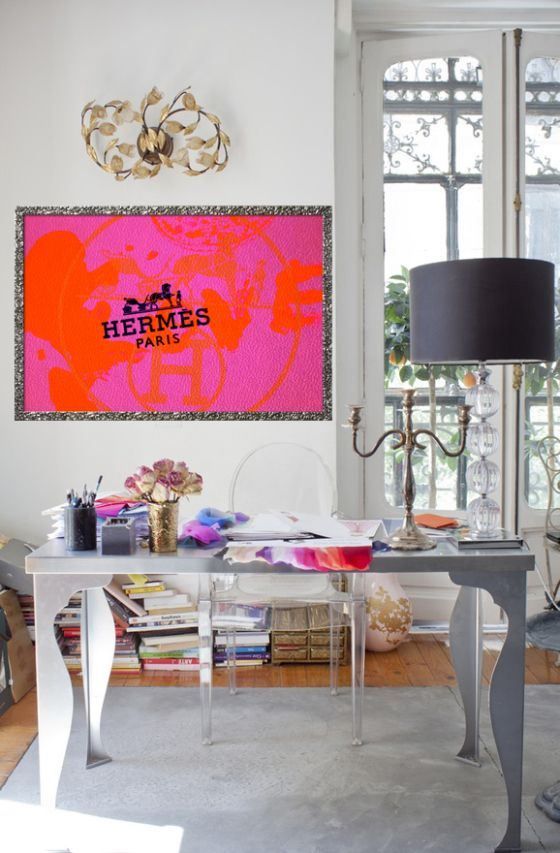
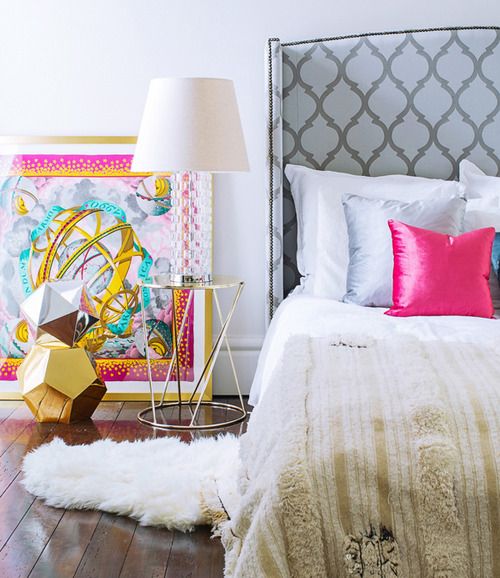
Silk scarves are works of art, so why not display them as such?   Framing your favorite vintage scarf can be the perfect art piece for your space, and put those scarves that are hidden away to good use.  Try framing a Hermes or Emilio Pucci for a fresh look, or even random scarves from vintage or thrift stores if you’re not quite ready to part with your Hermes.  Another fun option is to frame vintage fabric and this can be a more budget friendly option.

Pucci Pink Blue and Red

Bright beautiful scarves can be framed professionally, which is very costly, or you can try this relatively easy DYI.  In this post we will take you step by step through the framing process.

Purple monkey

There are 4 Steps to frame a scarf:

  1. Find a frame that compliments your scarf and matches your décor. Scarves typically don’t fit standard frames so your best bet is to shop online for wholesale custom frames. This will ensure the perfect size for your scarf and you can shop within your budget.
  2. Flatten the scarf and carefully iron all the wrinkles. If you have a steamer, this will yield better results.
  3. Glue the scarf to the frame. The Jigsaw Designers recommend using spray glue on the cardboard or foam core to attach, and then stretch out all the wrinkles.  Other options are to use pins or tape by wrapping the scarf around the backside of the foam core.
  4. Use a plexi or glass lens cover to protect the fabric from dirt and moister.

Viola!  Time to display your brilliant work of art!  While these steps are the quickest and easiest methods, we do recommend practicing with the glue on a piece of silk or fabric for your first time.  If you have a lot of free time on your hands, then another option is during step 3, to actually sew your scarf to a piece of cotton or linen first and then glue that piece to the cardboard backing.  This keeps the scarf safe for future use if you eventually would like to wear it again.

12 Blue


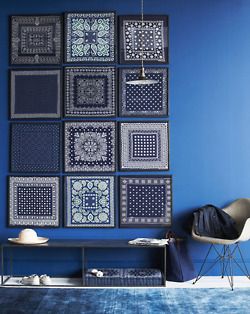
Framed scarves are color confident and will add flavor to any room.  This DYI project is fun and can be completed quickly and easily.  If you are feeling really crafty try making scarf pillows to add to your vintage look.  Enjoy the project and we’d love to hear about your scarf framing results.

Neon Pink and OrANGE


pink pillow

For more information on framed scarves and resources visit the contact page on the Jigsaw Design Group website at www.jigsawdesigngroup.com.  Someone will quickly contact you with more information.  Please subscribe to the blog for more informative articles like these, and check out our Facebook page for more tips and images!  Be sure to ‘like us’ on Facebook!

Holiday Season Tile Quick Fix-Painting Your Tile

As the holidays arrive at lightning speed, so do our friends and relatives.  Sometime you want a quick update here and there especially in your kitchen or bathrooms where your guests will surely frequent.  Painting dated tile is a fast way to update the look of a room without having to bring in a crew for 3 days to demolition, and install.  You do have better things to do like shopping and cooking right?  In this blog we will take you through the steps of this quick update and show you some recent results from a client.

Before Photo:


kitch before agle


After Photo:

kitchen angle after


The first step is to decide if you want to attempt a DYI project or hire a professional painter.  Unless you are a very confident painter we suggest hiring a painter.  The job can be done in one day which won’t tie you down to the house or cost you a small fortune.

The next step is to prep the tile by sanding with 100 Grit Sandpaper lightly after a thorough cleaning.  After sanding, the tile will need to be wiped with a damp cloth and dried.

There are then a few choices to make for the paint and primer.  If you are painting with color, the Jigsaw Designers suggest using high quality paint like Benjamin Moore Advanced Waterbase Paint.  The finish is smooth and glossy and can be applied with a brush or roller once the tile has been primed.  Be sure to use a primer that is suggested for tile or porcelain surfaces.  Go Prime Primer or Zinsser are both good quality ‘glossy surface’ primers for this type of job and can be applied with a roller.  Most primers should dry for about 3 hours.  After the primer has dried, then a second sanding is best with 220 grade grit.  Followed by a damp cloth to pick up any remaining dust.

Zinsser

Now that your tile is sanded and primed, the last step before painting is to tape and paper everything in the area.  Cabinets, counters, appliances, facets all need to be thoroughly covered by brown paper and low tack tape.

paper 2

paper

All white homes and kitchens are all the rage these days and if you find yourself wanting to paint your tile white another options would be to use white epoxy made for porcelain sinks, tubs, and tile.  The Jigsaw Designers recently did a kitchen update for a client that wanted to paint the existing tile with Homax Tub & Sink Refinishing Kit.  The epoxy comes in a spray so there is no risk of brush strokes, and this eliminates the step of primer.  The kit costs about $45 and you will likely need at least a few kits for perfect coverage.  The kitchen in the images below took 4 coats.  The full cure is about 96 hours so plan to eat take out for a few days if you are doing the kitchen.

kit

kitchen corner after

While a tile redo may be the ideal answer, painting your tile can be a satisfying way fill in the gap until you have more time.  If your tile is still in good condition like this kitchen was, then painting is good solution to make that color change you desire.  The results in this update where fantastic and will give the client a great update to get through the busy holidays.

kitch forward after


For more information on painting tile and resources visit the contact page on the Jigsaw Design Group website at www.jigsawdesigngroup.com.  Someone will quickly contact you with more information.  Please subscribe to the blog for more informative articles like these, and check out our Facebook page for more tips and images!  Be sure to ‘like us’ on Facebook!

grey tile

before after


Counting Sheep-Mongolian Sheepskin Trend

Recently we have been counting sheep.  Sheepskin that is…Mongolian Sheepskin which is the haute trend popping up everywhere fashionable lately.  Think retro glam meets 60’s nostalgia.  From home goods to apparel this look is fun and fresh, and can be adapted to a variety of styles and spaces

Stools in Living stool near bench Mirrored dresser

The Jigsaw Designers love this trend to add texture and a bit of whimsy to an otherwise stale space.  In the images below the grey monochromatic rooms are beautiful, however the grey sheepskin throw adds that extra something special to maximize the look of the room with the texture from the throw.  These two rooms have a more traditional look to them, so the sheepskin helps create a slight retro vibe to give these rooms more personality.

Grey Monochrome industrial

Grey Room cozy

Scandinavian

For an element of surprise, consider adding a sheepskin bench to your dining area.  It’s so soft your guests are sure to linger after dinner.

Skin Bench w royal blue chairs

Benches, pillows and throws are always the easiest update.  They are typically affordable and can be replaced as styles change.  Some on the other hand are more of a commitment due to the expense, but they are worth it.  We love this sheep and Lucite stool by Jonathan Adler; however it will set you back about $1300.  If you want to splurge, then the Moss Studio gold metal bench at $2200 is vintage cool at its best.

Sheep and Lucite

Sheep Gold bench

If you are looking for a more “disposable” price point, then Ikea and Costco have a cute sheepskin throw that is very affordable.  Anthropology also offers a Mongolian sheepskin chair and ottoman that are well crafted for a reasonable price.

Anthropologie chair

Anthropologie ottoman

While this look may not be for everyone’s space, we can all admit it sure looks cozy.  Share with us your sheepskin favorites.  We enjoy hearing from our readers.

Black Skin Office

sheep pillows

Rattan Swing Sheep


For more information on Mongolian sheepskin and resources visit the contact page on the Jigsaw Design Group website at www.jigsawdesigngroup.com.  Someone will quickly contact you with more information.  Please subscribe to the blog for more informative articles like these, and check out our Facebook page for more tips and images!  Be sure to ‘like us’ on Facebook!

Skin Bedspread

Custom Wine Cellars

Good-bye wet bar…HELLO wine cellar!  Custom designed wine cellars are growing in popularity for renovations and new builds.  For the amateur and the aficionado alike, custom wine cellars and home tasting rooms are at the top of the Jigsaw client’s want list.  The social aspect of wine tasting and collecting has grown immensely in recent years and homeowners are carving out space in their home and budget to add the perfect cellar.


curvelinier


A state of the art cellar with genius storage and lux design is both sexy and a great place for entertaining. Whether your taste tends to be sleek and modern or rustic charm, these social spaces are downright cool!  In the following image the cellar is simple in design with clean lines, and mixed materials of stainless steel and layered stone.  A look that screams style!

STainless Cellar

The sophisticated retreat in the image below is a converted basement.  The curved ceiling coupled with the curved glass adds a custom designed touch that really transforms this into a unique escape from the world.  Pendant lamps and soft neutrals make this cellar inviting and relaxing.

Basement wine room cellar curved ceilings

A little tight on space?  No problem, these imaginative wine storage rooms can be hidden under the stairs and displayed with glass walls and doors for saving space.  Or simply add a glass wine storage cabinet to an existing wall in the kitchen to be aesthetically pleasing as well as functional.  If you are working on a budget and have no extra room for a cellar, try setting up shelving in a. existing room to display wine like a wine library.  However the temperature will not be controlled like most cellars, it’s still a perfect look for the hipster in you.

Wine storage under stairs

contemporary under stairs

wine storage glass case

wine storage library like

The Jigsaw Designers love incorporating spaces together in unique ways like in the dining room below.  Why not make a wall in your dining room a glass walled cellar for your guests to “oh and ah” over your extensive collections of wine.  Wine is art, so why not display it as so.


wine wall as art in dining

Jigsaw Designers find that using an existing pantry to convert into a wine storage area is a great place to add wine storage or cellar.  With it being an existing space and wired with electricity the renovation will be much easier and budget friendly.  If it’s not large enough for a cellar, a small tasting room and intelligently designed storage area can be a great solution.


wine storage off kitchen cararra floor

storage circles

If your budget is carte blanch, then why not create a fantasy space or a work of art.  Surround your guest with walls of wine as you spiral down a staircase cut right into the floor.  Or create a mystical ambiance with unique lighting and storage that is more like a work of art, all while natural light cascades from the glass floors in the sitting room over-head.

cellar trap door

blue illuminated

The wine cellar is a fun and relaxing space and it should reflect your personality just like the rest of your house.  All you need are the functional pieces, then a little creativity and a lot of wine.

neon cell


For more information on custom wine cellars and resources visit the contact page on the Jigsaw Design Group website at www.jigsawdesigngroup.com.  Someone will quickly contact you with more information.  Please subscribe to the blog for more informative articles like these, and check out our Facebook page for more tips and images!  Be sure to ‘like us’ on Facebook!

hole in floor brick