Tag Archives: DYI

Smoke and Mirrors

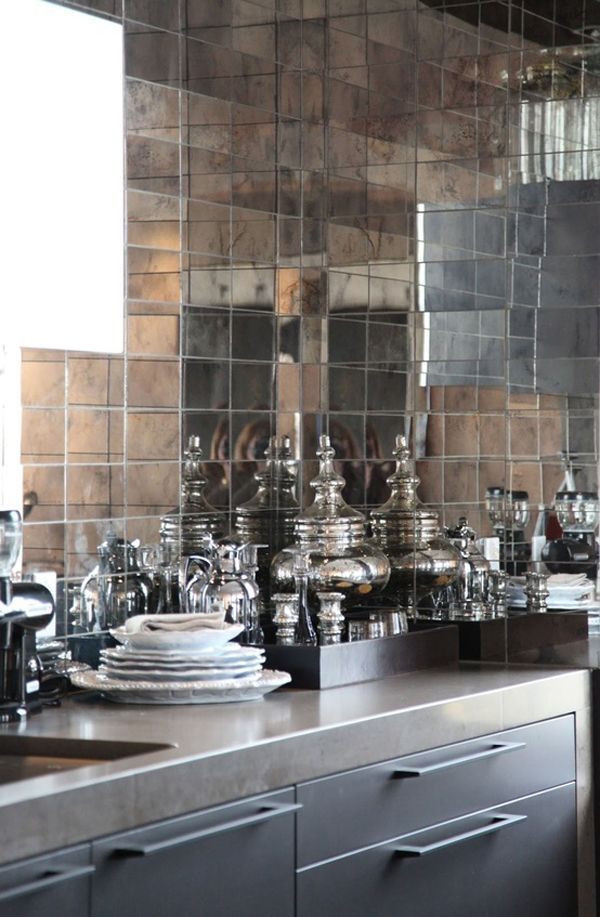
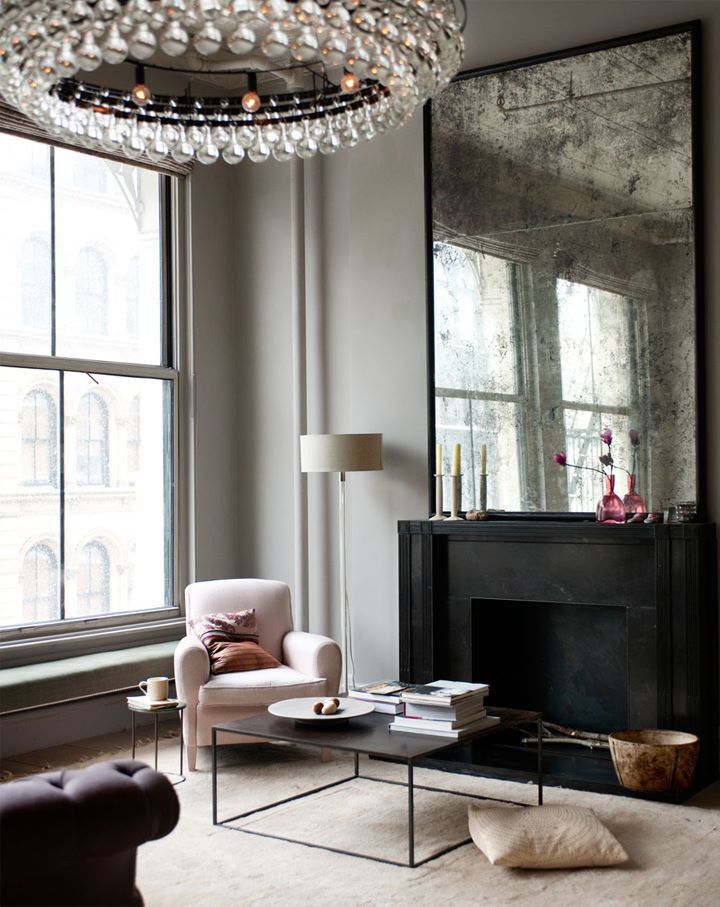
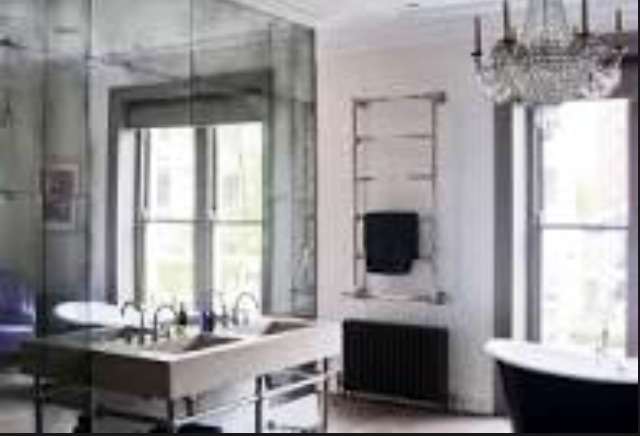
Smoked mirrors, also known as antiqued mirrors, are suddenly all the rage.  These vintage throw back mirrors are a fabulous way to add an antique touch with a modern spin to any room of the house or office.  Used in a variety of ways, smoked mirrors can be to add depth, light, and the optical illusion of more space.  Floor length wall mirrors, bar back splashes and even furniture are a few ways to integrate this look into your space.

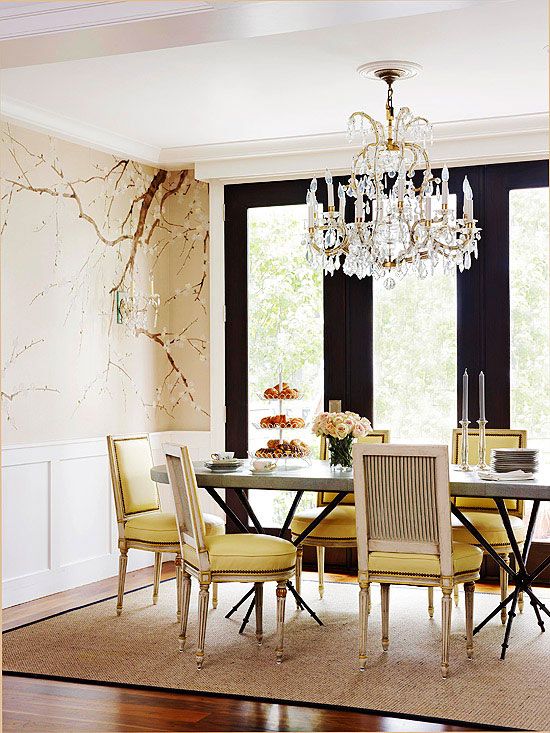
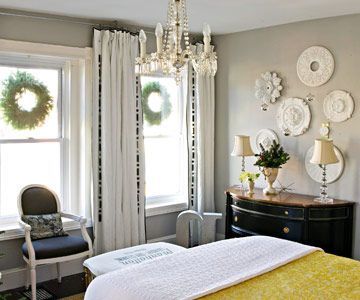
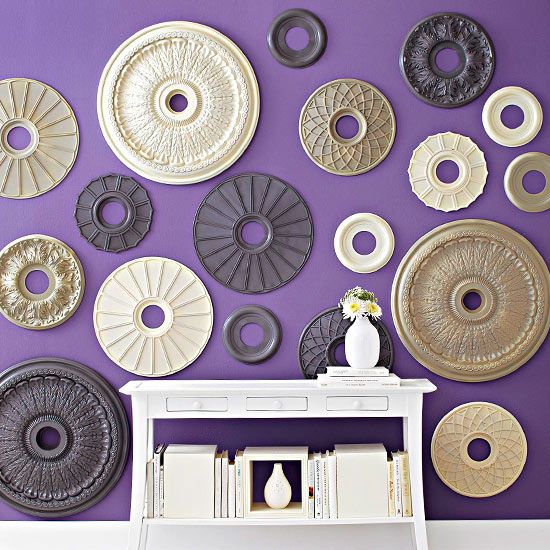
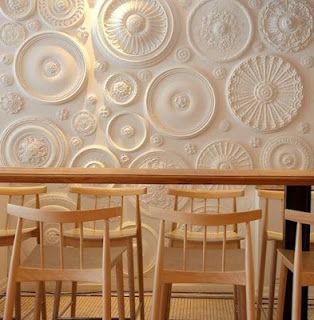
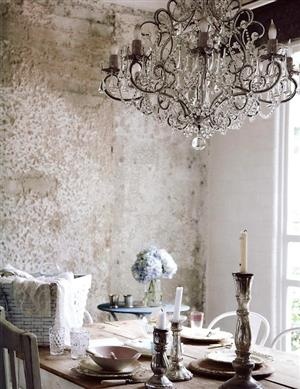
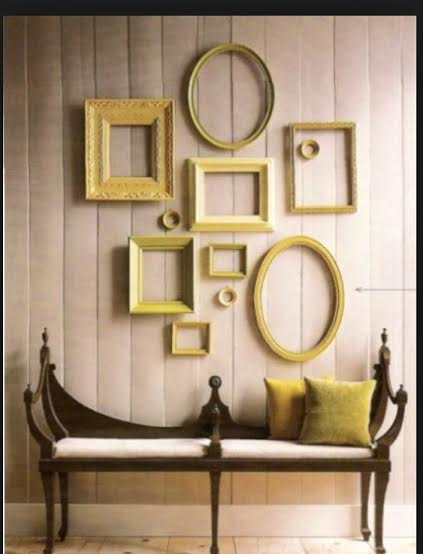
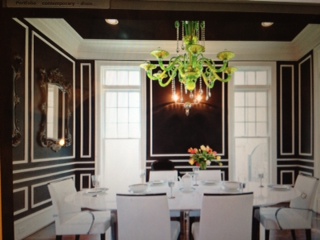
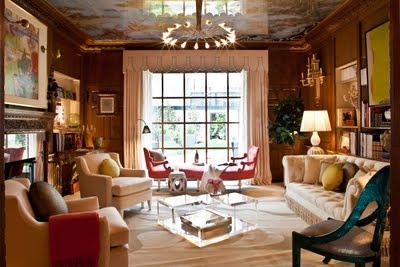
The Jigsaw Designers love the smoky mirror trend and like finding unique ways to use this uber-cool accessory.  We like mixing the vintage vibe of the mirror with modern, traditional and even French decor.  It is a great accent for a table top or even an entire wall in your dining room like the image we have included below.   To be on-trend you can get the look easily by having a small piece cut for your dresser or make up table for a chic updated look.Dining room

Wall Mirr Bed

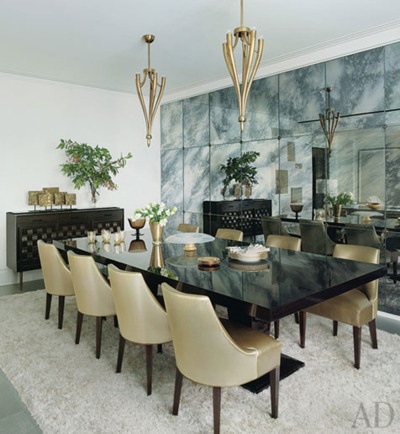
Smoked mirrors can be found in many different patinas, bronze and grey being most popular.  We’ve found they are also available in a wide variety of colors from hot pink to deep blue, but those just take a bit of research to find on-line.  Many shapes are available too; harlequin, square, individual tiles, rectangles as well as baroque.  So where might one find such mirrors?  Well, frankly, anywhere if you dig a little.  Vintage flea markets, design shops, on-line, or even homemade if you like a do it yourself project.

Mirror 1

Tiles

Ceiling

The process of creating your own smoky mirror is a bit messy, but relatively easy.  Here are a few simple steps to follow, and a list of the supplies you will need: First you will need a mirror, after that you will need paint stripper, black patina, putty spreader, a chip brush, and silver paint.

Step 1: Wearing gloves, place the mirror face down on a protected surface in an area that is well-ventilated. Apply stripper to the back of the mirror and allow it to sit for a few hours, or until paint can be easily removed with a plastic scraper. Once the paint has been stripped, wash the mirror with soap and water and allow it to dry for a few hours.

Step 2: Dip the brush in a patina metal solution (we recommend Modern Masters) and apply it to the reflective surface of the mirror. Rinse with water to neutralize the reaction and allow to dry.

Step 3: Apply the silver paint (or color of choice) until the reflective surface is completely covered.  Once the paint is dry you have your smoky vintage mirror.

Fireplace

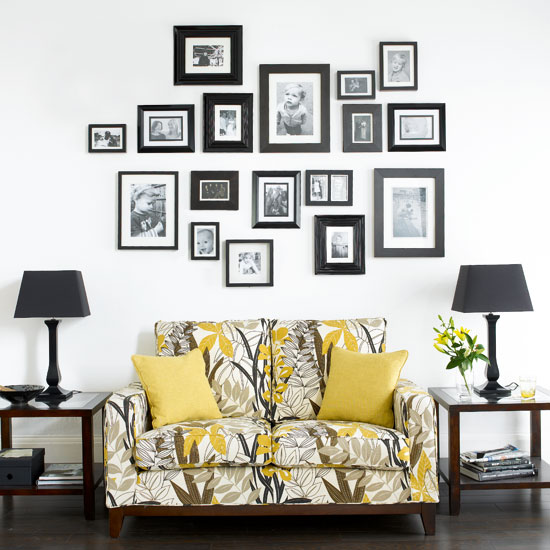
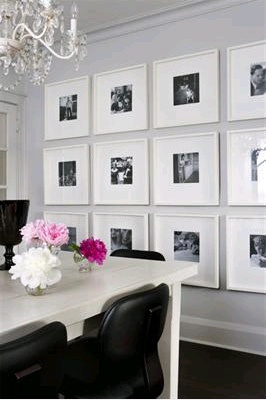
The Jigsaw Designers believe the smoky mirror will make a bigger statement when up against the traditional silver mirror.   This trend is sexy and here to stay so add a pop of vintage cool to you room for an updated twist on the average mirror.

Mirror 3

For more information on smokey mirrors and resources visit the contact page on the Jigsaw Design Group website at www.jigsawdesigngroup.com.  Someone will quickly contact you with more information.  Please subscribe to the blog for more informative articles like these, and check out our Facebook page for more tips and images!  Be sure to ‘like us’ on Facebook!

The New Look of Wainscoting

Installing wainscoting in your home is a great way to add visual interest to a room.   Until recently wainscoting was reserved for a very specific style of home, but today there are a variety of styles available.  In this post we will touch on only a few of the many varieties and ideas, but we can promise that no matter the style of your home there is a wainscoting out there waiting to elevate the look of your home.

simple wains gorgeous dining

stripe room

verti tall hallway

To set the record straight there are several types that quantify as ‘wainscoting”. There is the official ‘wainscoting’ that is wood paneling and railing, manufactured bead board, and board and batten all that achieve the look typically referred to as ‘wainscoting’.  All of these looks can be easily adapted to your style and budget.  While some remain a job for the professional, there are easy DIY instructions you can find on a handful of websites if you are working on a budget.

Depending on the style of home or the direction you want to take it will decide on the wainscoting style and application to use.  Bead board is one of the most readily available options as well as cost effective and DIY friendly.  Try using bead board horizontally for a fresher, less traditional look.  To customize their own look, the Jigsaw Designers have used MDF board from Home Depot, measured out the desired widths, marked the board, and cut grooves with a table saw (shortening the setting height on the saw to cut grooves, not to cut through the board). Then the board is hung on the wall and paint to the desired color.  See a few examples below for inspiration.

horiz bath

kids horiz

Wainscoting can help anchor a room with lots of wall space or unusually high ceilings by adding dimension and architectural interest.  Crisp white wainscoting can make a room feel fresh and light.  While painting wainscoting brings an elegance and sense of coziness.  In the images below you can see how the gray floor to ceiling wainscoting warms the room allowing simplicity in the décor while still making a statement.

one grey living

grey baby

Think of wainscoting as a ‘free style’ design element.  You can take it as high up the wall as you like, as long as it makes sense in the room.  You can paint it or not, and you can choose a style that is traditional or with something really trendy and forward (however likely a fad).  There are so many different styles available at market; circular, Greek key…the list goes on.  Peruse the images below to see a small sampling of some of the unique options available.

unique blue

hallway

uniqe sink

reclaimed wood kids

Adding wainscoting to your home is a great way to give your room the impact you are looking for.  Two more great reasons to install are that it is easy to find and can be relatively inexpensive.  Whether you are planning to do it yourself or hire a contractor, you can update to your space quickly and easily.  We hope this post has given you fresh ideas for the use of wainscoting.  Have fun with your project and let us know how it turns out.  We like hearing from you.

busy staircase

barn board

For more information on wainscoting and resources visit the contact page on the Jigsaw Design Group website at www.jigsawdesigngroup.com.  Someone will quickly contact you with more information.  Please subscribe to the blog for more informative articles like these, and check out our Facebook page for more tips and images!  Be sure to ‘like us’ on Facebook!

2 tone girls

Wall Medallions

Finding the perfect artwork for your space does not have to break your budget when you can create a custom art wall with Ceiling Medallions.  The look is extraordinary and is one of the easiest DIY projects you can ever attempt.  In a recent post here at Jigsaw, we shared tips and information about Ceiling Medallions being applied around chandeliers and light fixtures for a polished look.  In this post, we will dig a little deeper and teach you how to install this unique look yourself for a dramatic statement in your home, office, or business.

traditional bedroom beige room close up

To create the wall you will need to the following items to begin: Medallions, paint, paint brushes, hanging wall tape, painters tape and paper.    The first step will be to purchase the Medallions, which come in a variety of sizes, and styles and are readily available in the marketplace.  They can also be found on-line at architecturaldepot.com and classicceilings.com.  The Jigsaw team have found the quality to be nice and made of good materials and not plastic.  Prices range generally from $12-$55 and can go upwards from there.

The next step will be to paint the medallions.  Painting the medallions the same color as your wall creates a gorgeous custom designer look.  The Jigsaw Designers like using a variety of designs and sizes with a monochromatic color scheme for maximum impact.  Contrasting colors or accent colors are also beautiful.  You will see in the images below where the medallions were layered on top of rolled raffia for an interesting play on textures.  Be free to be as creative as you want.  This look is exciting and unique, and there are no rules.

raffia

Once your wall and medallions are painted and dried, the next step is to choose the layout.  Follow the same method for hanging as with picture frames.  Trace the shapes on paper and tape them on the wall, or simply lay them out on the floor.  Next, since the medallions are so light weight you can easily apply Double Sided Hanging Tape to the back of the medallion and then press onto the wall.  Viola!  That simple.

multi colored

Wall medallions create a fresh and unique look that is exclusively yours.  You can also incorporate photos on your medallion wall by simply taping the images to the back of the center cut-out.  We hope this post will give rise to your imagination for your very own medallion wall.

green

dining

pink couch

For more information on wall medallions and resources visit the contact page on the Jigsaw Design Group website at www.jigsawdesigngroup.com.  Someone will quickly contact you with more information.  Please subscribe to the blog for more informative articles like these, and check out our Facebook page for more tips and images!  Be sure to ‘like us’ on Facebook!

Brick Wall Interiors

Exposed brick walls are an attractive way to add a rustic modern touch to your home.  Regardless of the style of your home this trend can be adapted into most interiors and blend beautifully.  The organic feel of the bricks have an overall industrial look with a historical quality.  Therefore from the modern to traditional home this stylish trend can work well in a small area or an entire room.  Bricking one wall in a bedroom or bathroom may be just enough to achieve the look without overdoing it.  See the images of the bedroom below, the soft palette coupled with the brick and chandelier are inviting and timeless.  The brick wall is so flexible that this bedroom could be in an industrial loft, beach house or even a Provencal home in the south of France.

brick bedroom

The Jigsaw Designers love to merge the styles of rustic modern and Hollywood glam with a brick wall being the common denominator.  The rustic rough surface of the bricks with their geometric layout, coupled with the crystals and curved lines of the ultra-feminine chandelier create a cozy space and bridge the gap between masculine and feminine.  Here you will see two great examples of mixing the rustic and glam looks together for a room you may never want to leave.

brick chandelier dining

brick chandelier

There are a few options for adding a brick wall to the interior of your home.  The first is to expose existing bricks.  Older homes often have brick underneath the plaster walls, and the brick may still be in good condition, if not it will need to be restored.   The second way is to have actual brick and mortar installed in your home.  This method is more authentic than panels, but labor-intensive (aka cost intensive) and be prepared to lose several inches of space along the wall or the entire room if you plan to brick the full room.  Lastly and most easily installed are brick panels called brick veneers.  In this method thin bricks are bonded to the drywall much like tile.  Due to the veneer being thin, you don’t lose the space like real brick, and if you are handy and have a wet saw (or access to one), you can do this project yourself.  Keep checking back for the Jigsaw Design DIY Brick Wall video-blog, due out this summer.

process brick

The Rustic Modern look is on top in trends right now.  It is a very versatile look and a great way to combine masculine and feminine.  The exposed brick wall is the pinnacle of this look and can be easily achieved.  We hope this post will inspire you to add your own brick wall and let us know how your project turns out.  We enjoy hearing from you.

brick curved ceiling

Emily Wren Photography

Brick loft dine

For more information on brick wall interiors and resources visit the contact page on the Jigsaw Design Group website at www.jigsawdesigngroup.com.  Someone will quickly contact you with more information.  Please subscribe to the blog for more informative articles like these, and check out our Facebook page for more tips and images!  Be sure to ‘like us’ on Facebook!

The Empty Frame Wall

Sometimes less really is more.  If you are searching for a unique design idea for a focal point in your room, then look no further.  A “picture-less” frame wall may be just the answer.  Hanging a cluster of empty frames will create visual interest with a very stylish minimal approach.

Picture less 1

The look of the empty frame wall is avant-garde yet can be achieved in any style home from traditional to modern.  Selecting frames that mesh with the style of your space is the most important factor to consider.  Using vintage thrift store finds for French country décor, ornate baroque frames for Hollywood Glam or a mix them all for the more eclectic home.  Once you have selected your frames consider painting them all a single color for a cohesive art wall.  The Jigsaw Designers love painting a bold color on the wall behind the frames for maximum impact.  Using a variety of different color frames will also work beautifully if they complement the colors and style throughout your space.

White Frames

Vintage frames

Once you have selected the frames and finished any necessary painting, it’s time to hang your frames in a cluster that fits the style of your space.  Frames can be hung from floor to ceiling, or in several straight perfectly measured rows, whatever you find most visually appealing.  Next, laying the frames out on the floor is the best way to decide the final layout.   For more detailed information on how to hang your frames, see our previous post on Photo Walls.  There are no rules when it comes to hanging your frames.  Have fun with your layout and express who you are.  We love this office with the single oversized frame above the desk.  It’s arty and quirky and sometimes we just need this kind of lightheartedness at the office.

Desk frame

At Jigsaw, we love the “picture-less” frame wall…and think of all the coin you will be saving on art.  Frames inside of frames, a variety of sizes and shapes, you can’t go wrong.  Have fun experimenting with this easy DIY design project.

Pictureless 3

For more information on the empty frame wall and resources visit the contact page on the Jigsaw Design Group website at www.jigsawdesigngroup.com.  Someone will quickly contact you with more information.  Please subscribe to the blog for more informative articles like these, and check out our Facebook page for more tips and images!  Be sure to ‘like us’ on Facebook!

Une Touche d’ Elégance

You have everything perfectly decorated in your space.  You take a step back to admire your decorating skills, and you think…something is missing!  After you peruse the images below, you will find the answer and know that it’s simple and understated, but it speaks volumes of l’elegance…molding!  With a few easy steps and some inexpensive chair railing you can transform you bedroom to a decadent boudoir, a dining room into a social retreat, or your living room into an elegant lounge.  At Jigsaw, we love adding chair railing to any room to maximize impact.  It’s fun, it’s sexy and it’s easy…and we are going to show you how!

Here are the steps:

  1. Select the width and style of railing you’d like to use for your project.  Railing can be found at Home Depot, Lowe’s or most lumber yards.
  2. Measure the size box you want, and the height of the chair rail (if desired).
  3. Use a yardstick to draw the box directly on the wall.  If you plan to use one color paint on the wall, the Jigsaw Designers recommend painting the full wall first, and then draw your railing.
  4. Cut the railing with the measurements using an angle saw.  Railing can be cut at Home Depot, Lowe’s or any lumber yard you choose if you don’t have an angle saw.
  5. Paint the railing the desired color.
  6. Nail the railing into the wall in the center of the railing.  Fill in the corner cracks and nail holes with putty if necessary and then touch up paint.

These are the simple steps to follow.  After that you can get as creative as you dare with painting.  Below you will see how the Jigsaw team transformed a dull drab office into a glamorous and exciting place to work.  First they painted the entire wall black, and then added the white chair railing.  The overall look is classic and stunning.

Depth and dimension can be added to the room using monochromatic colors on the wall as well.  For example a darker grey paint below the railing and a lighter grey above the railing can add interest without being too busy.  Tone on tone can also be a very chic way to add railing in an understated fashion.  While the Jigsaw Designers recommend using a professional for crown molding around the ceiling, they are however confident that anyone can complete this project with great results.  We hope you are inspired to add drama and elegance to your space by following these simple steps for your railing project.

Before and After Photos:

Before Mold 2

molding 3before 3Office 1Mold Dining roomMolding bedmolding fabric


For more information on wall moldings and resources visit the contact page on the Jigsaw Design Group website at www.jigsawdesigngroup.com.  Someone will quickly contact you with more information.  Please subscribe to the blog for more informative articles like these, and check out our Facebook page for more tips and images!  Be sure to ‘like us’ on Facebook!

The Updated Photo Wall

The modern day photo wall isn’t your traditional grandmother’s brag wall anymore.  When selecting the right frames and using a fresh layout, you can create a work of art.  We’ve mapped out some simple steps to make what seems like a daunting process enjoyable.

The first step of course is selecting some initial photos that you want to frame.  The Jigsaw Designers suggest mixing black and white images with color to not limit your use of vintage family photos with your most recent ones.   Next step is choosing an overall theme for your frames.  Selecting a look that matches your style or something you’d like to compliment in your home for a cohesive look.  The Jigsaw Designers recently installed a picture wall with all white high gloss frames mixing baroque, arabesque and simple style frames.  The inspiration came from a trendy local hotel and perfectly complimented the existing white wrought iron and cabinetry in her home.  Being limited on photo display space the result was a fresh modern art wall where the client could enjoy her much loved family photos every day. 

Next, we recommend mixing in other elements into your picture wall to add depth and dimension.  A fleur d’lei, family initial, or even your child’s artwork are great ways to add variety to your wall and express your personality.  Once you selected all of your elements, it’s time to design the layout.  The best way to start is simply take all your art wall pieces and create a layout on your floor.  Move pieces around until you are satisfied with the flow.  If it’s tough to get started try roughly sketching out the frame shapes on paper and gently taping them to the wall.  Then move on to a mock layout on the floor to see what the finished look will be.

Once you’ve selected your layout you are ready to install.  You will need to use picture hangers for installation and a measuring tape to space all the elements precisely.  For a really crisp look, we recommend using a bubble measure to ensure the elements are perfectly straight.  Lastly, step back and admire your work of art. 

The modern day photo wall can be installed in any home or office, regardless of the overall style of the space.  It can add warmth and coziness to any room and make you feel surrounded by loved ones.  Whether you choose to make a photo wall with family photos or landscapes and artwork, following these steps will help you create a statement wall for you to be proud to display.

Photo wall 3

Photo wall 2

photo wall 1

For more information on photo walls and resources visit the contact page on the Jigsaw Design Group website at www.jigsawdesigngroup.com.  Someone will quickly contact you with more information.  Please subscribe to the blog for more informative articles like these, and check out our Facebook page for more tips and images!  Be sure to ‘like us’ on Facebook!